
Pom Pom and Tassel Wall Hangings
With all of our spending more time at home, I have been noticing little areas in my house that can use a little touching up. Some of our wall decor has been hanging for as long as we have lived in our house which is about seven years! Sometimes, you just need to change things up! Especially when you are home all the time! Bring in the pom pom and tassel wall hangings! These wall hangings can take many forms, and they can be completely adapted to fit your space. One of the best parts of these projects is that you probably already have most of the supplies at home! I didn’t want to spend a lot to refresh our spaces, and this is a great way to use up some of your craft supplies! I’ll show a few examples of different ways that you can create wall hangings, and I’ll pass along a few tips to help you make your own!
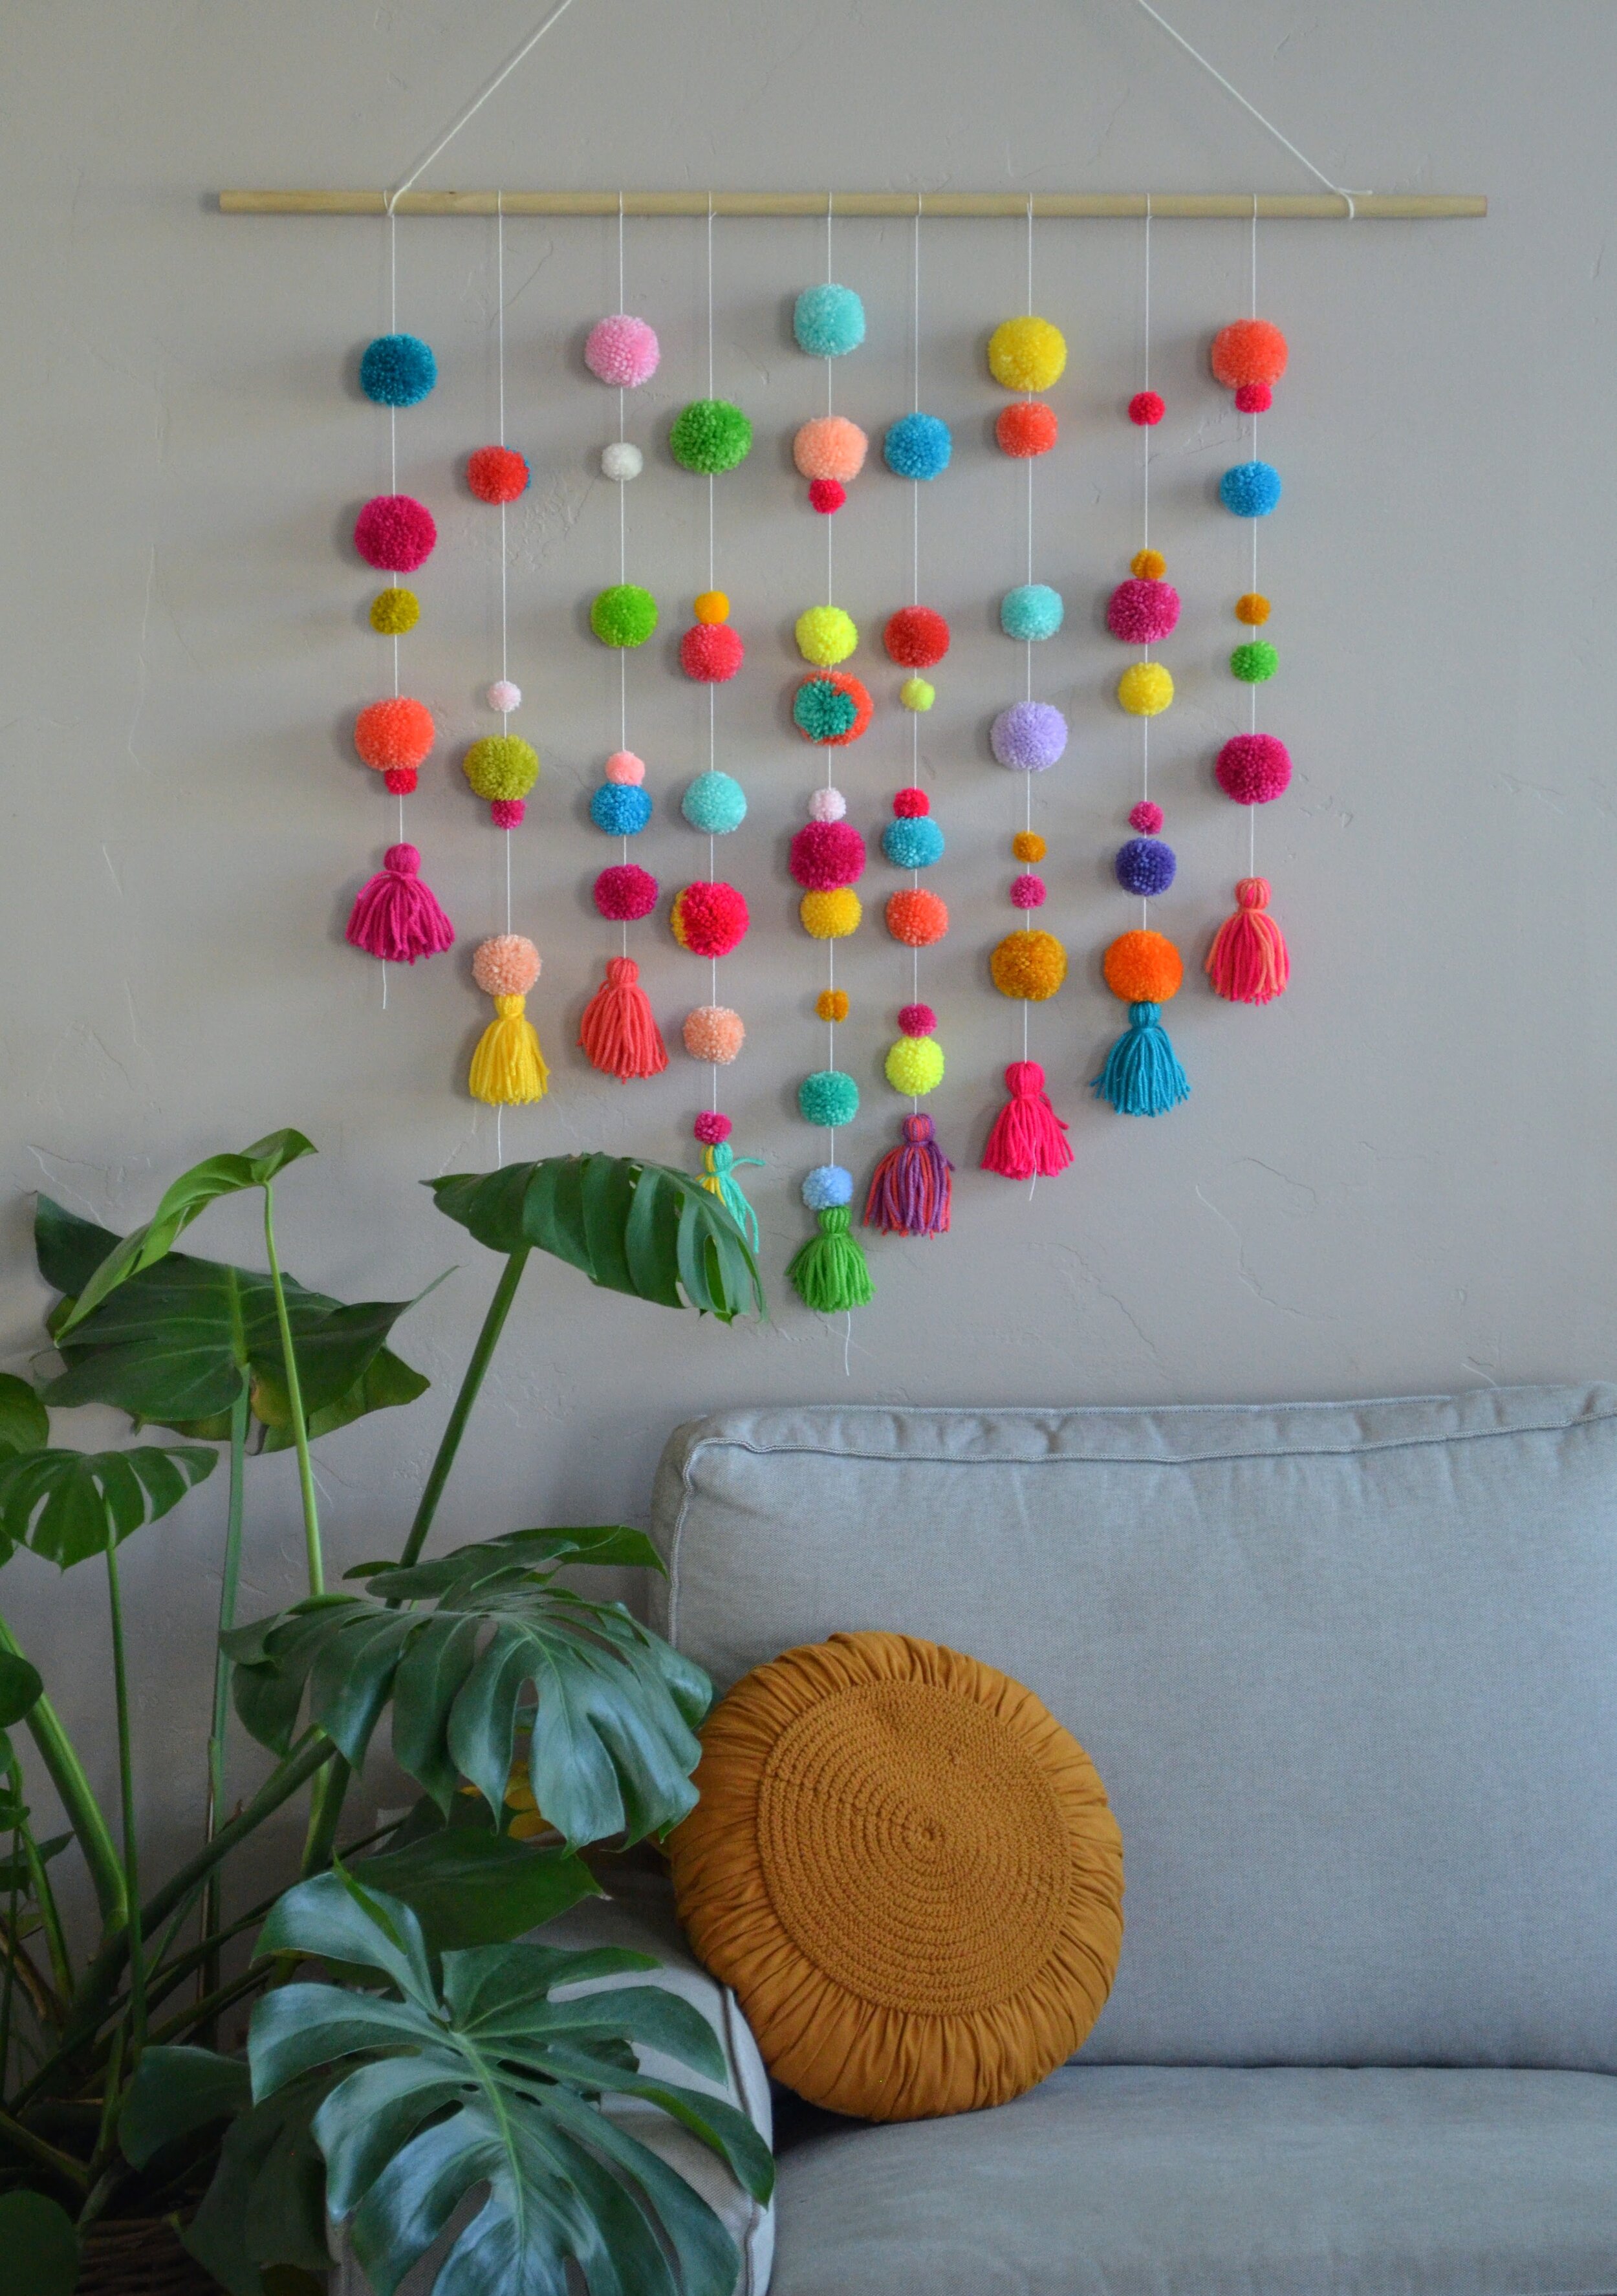
This pom pom hanging above can be made easily with a few pom poms, tassels, a wooden dowel or stick, and some string or twine. It packs a colorful punch and adds excitement to any wall.
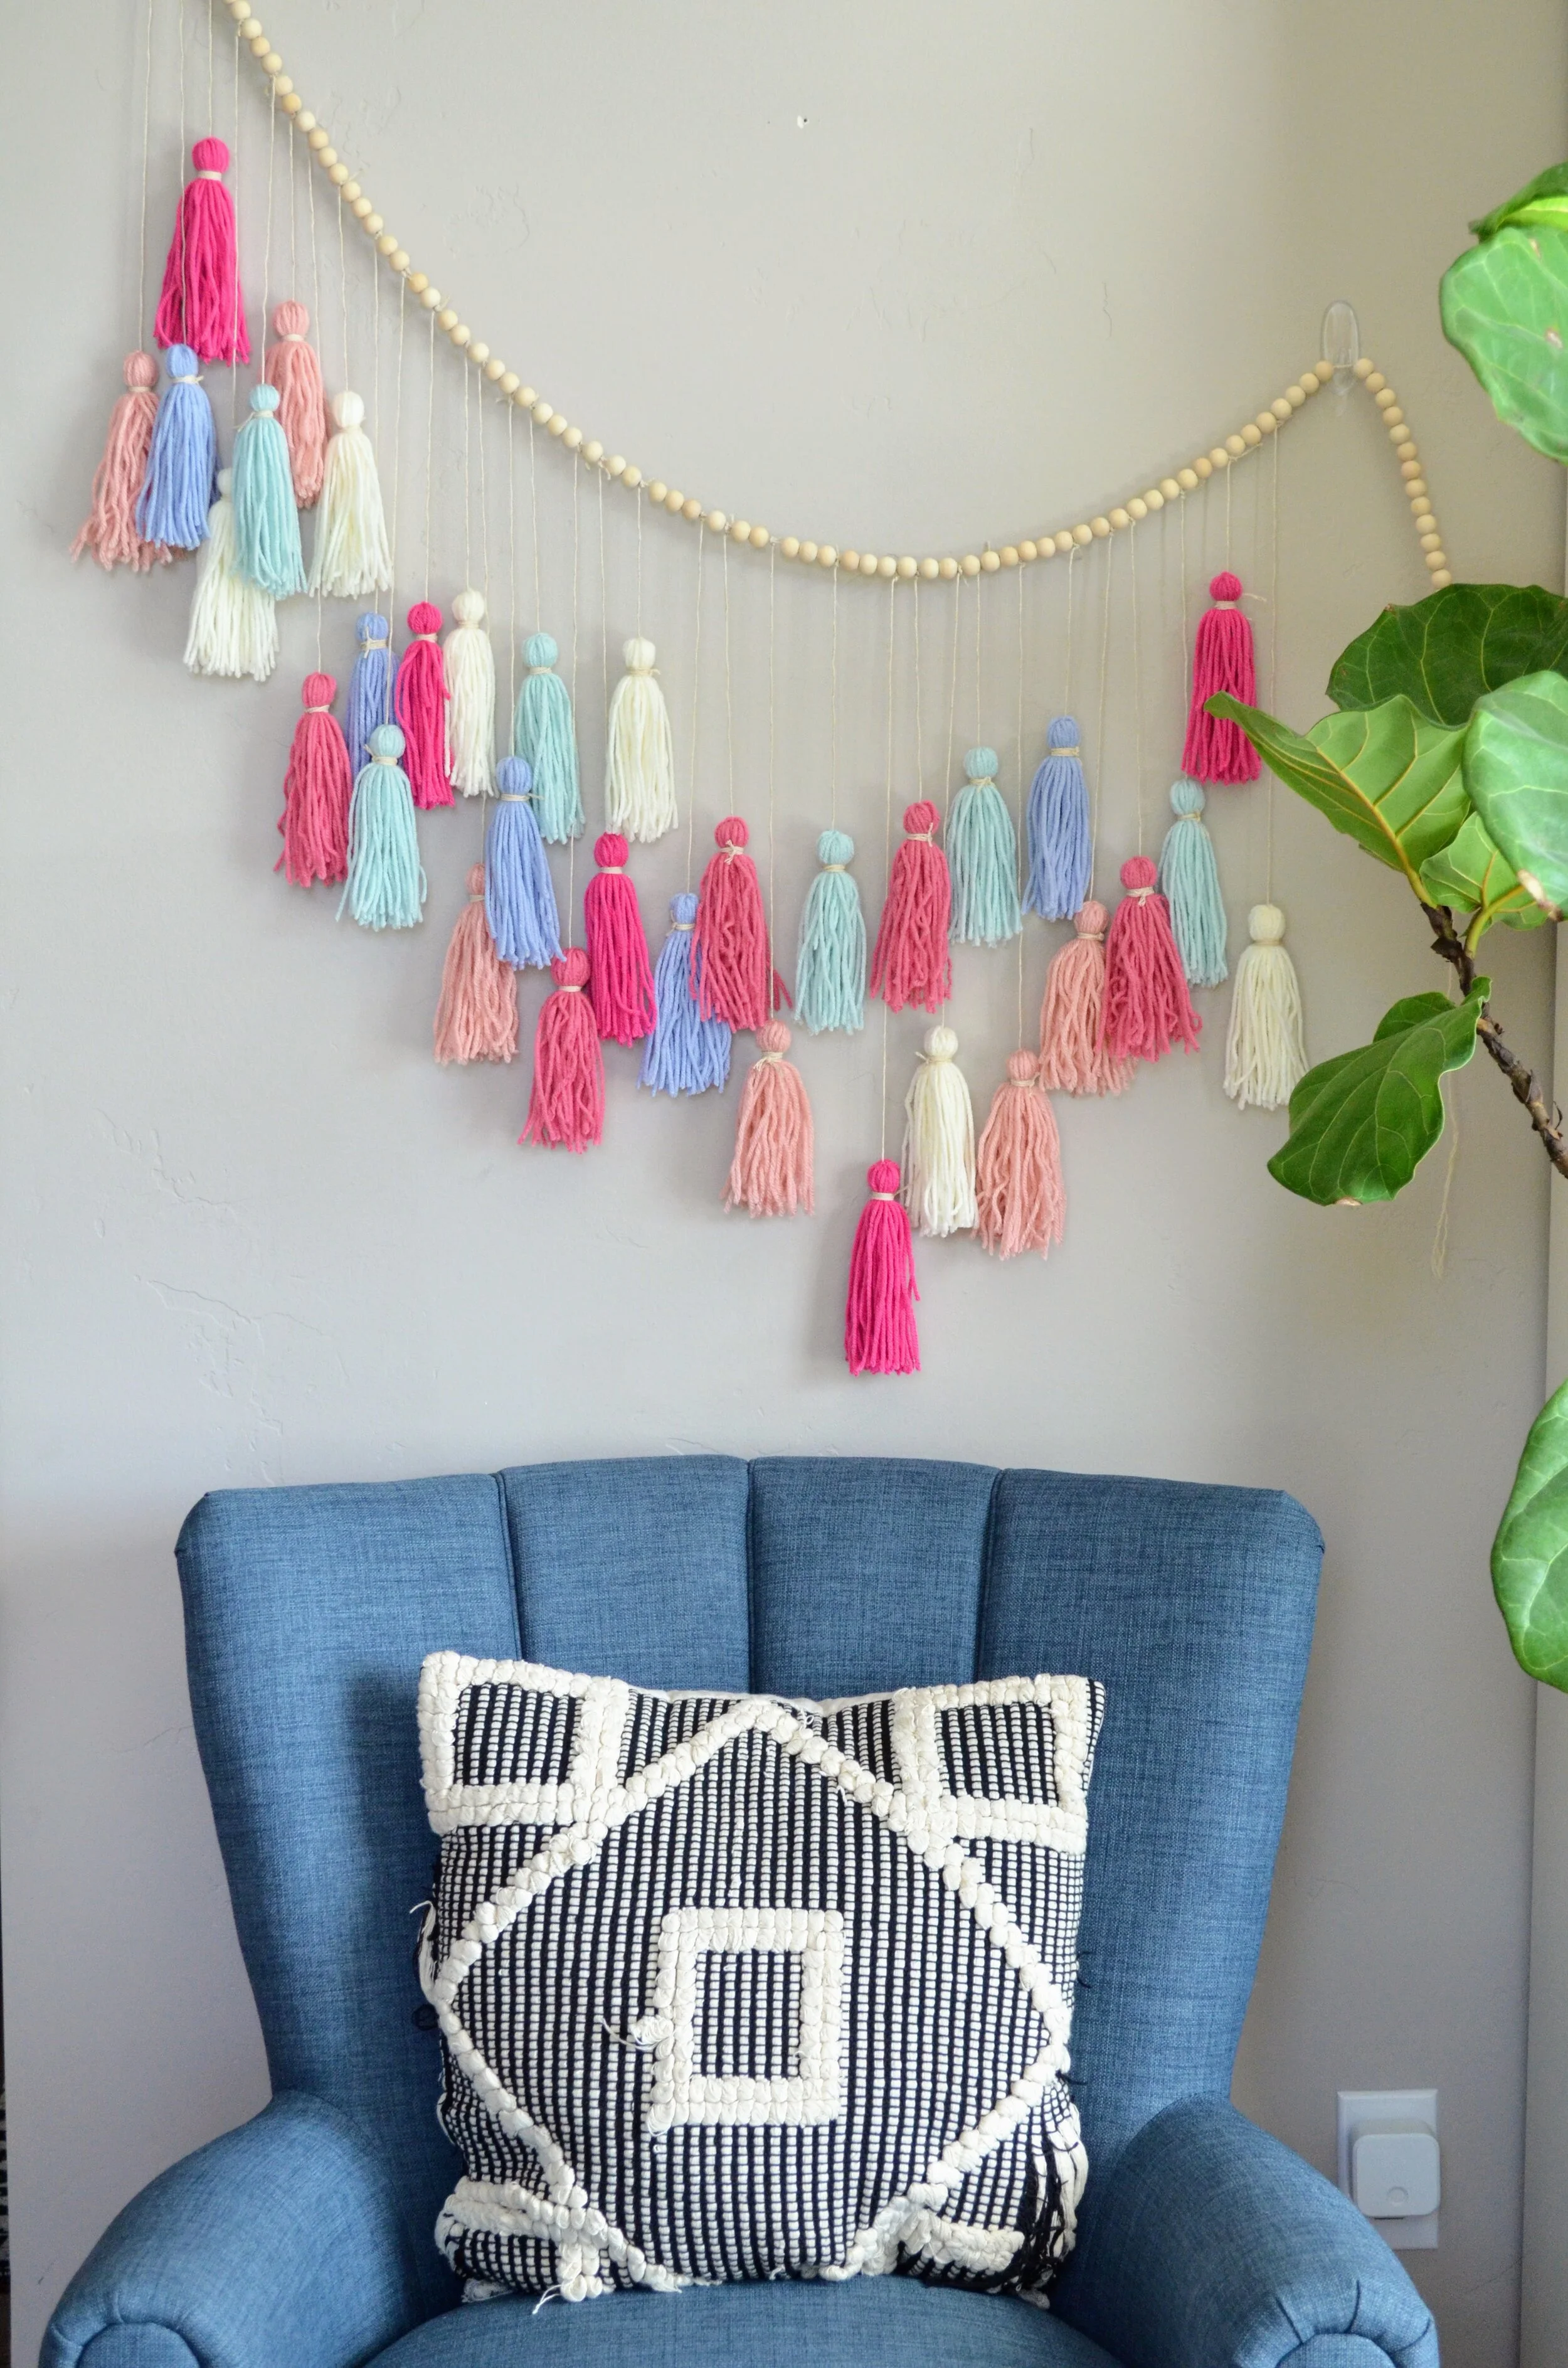
This wood bead and tassel wall hanging was actually inspired by a Potter Barn Teen wall hanging. I saw the Pottery Barn version and thought it was gorgeous, but it cost $89. This recreation only cost me about $8-10 for the wood beads and hemp cord. I had all of the yarn already, but even if you don’t have yarn, you can buy an inexpensive skein or two to complete the project. One of my sweet friends has a daughter who will be switching bedrooms, so I made this wall hanging to coordinate with the colors in her room. You can do this in all neutral colors too which would be beautiful!

Using wood beads and tassels in a slightly different way, this wall hanging gives a bit of a boho effect. My own daughter is turning 13 soon, and for her birthday, she asked for a bedroom update. She wanted her room to be a bit more grown-up (which sort of makes my mama heart sad!), so she moved away from lots of color to a very neutral palette. This wall hanging is going to hang above her bed to add texture to her new grown-up room.


Another fun approach to wall hangings can be found in the way you lay out your pom poms. The pom poms can be moved around on the strings to create shapes like this rainbow and heart.

A Few Tips and Tricks
Hanging pom poms is really similar to stringing a pom pom garland. You can catch my YouTube video about stringing a garland to see the basics. And you can also watch my video about Purse Pom Poms to see how to string through a tassel.
If you need help with making a pom pom, you can watch my Perfect Pom Pom video as well!
Use any kind of stick to hang your strings. Grab a stick from your yard or buy a dowel from a craft store. You also can use any kind of string for stringing. I used some white acrylic string, some hemp cord, and some sisal twine. You can use yarn too. I like mine string to be fairly thin so that it doesn’t take away from the pom pom or tassel design.
Lay out your design before you start stringing. I know this seems obvious, but it is so much easier to rearrange before your pom poms are strung. If you are doing a shaped wall hanging, it is really important to make sure you lay out your design first so that you can see which pom poms need to go on each string.
Cut your strings longer than you think you will need. It is always easier to trim your string than to add string. Plus with tying your string at the top, you will need to give yourself a few extra inches to account for that knot.
For pom pom hangings: string all of your pom poms using a metal yarn needle. Don’t tie any knots just yet. Not even at the bottom. This will allow you to arrange your pom poms without committing to any design until you have it the way you like it. If your pom poms are light enough, you don’t need to tie any knots in the middle of your strings. The pom poms will stay in place on their own. Tie strings onto sticks, arrange pom poms, then tie your bottom knots. Trim excess string.
For tassel hangings: you do want to tie a knot at the bottom of your string as you begin stringing your tassels. You don’t have pom poms to arrange, so you can go ahead and knot the bottom. Arrange your strings along your stick or wood bead garland, then tie to stick or garland. Trim extra string.
For the wood bead/tassel hanging: Tie a knot at the bottom of your strings before stringing your tassels. String beads on a string or hemp cord. Tie tassels onto the wood bead strand, knotting in between beads. Stagger the lengths of the tassel strings.
Kitchen cabinets make good hanging places for arranging. I hung mine from the cabinet above my microwave. It was able to give me plenty of space to work on arranging the pom poms and tassels.
Remember to hang your wall hangings out of reach of little hands. We wouldn’t want your little ones to pull off your tassels or beads!

Now go spruce up those walls! Make these hangings for your bedrooms, nursery, play room, or living room! There isn’t anywhere that a cute wall hanging can’t go! I’d love to see your completed projects! Make sure to tag me on Instagram!

